Back to MaintenanceDirect Main Menu
The Clerk role has access to the short work order form designed to expedite the data entry process. Administrators are also able to access this Short Work Order form by clicking on the Short Work Order Form link in the Work Order Shortcuts menu at the top of the Work Order page.
*Note: Fields that are marked with a red checkmark ( ) are required fields.
Watch the Video Tutorial:

- Click on the New Work Order tab.

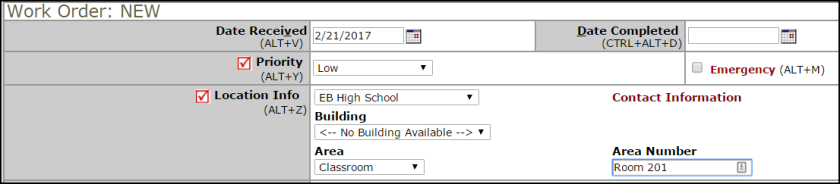
- The Date Received will automatically populate with today's date. *Note: If entering a work order that has already been completed, this date can be changed to the date of the actual request.
- If entering a work order that has already been completed, the Date Completed field allows you to identify the date the work was actually completed.
- From the Priority drop down box select the appropriate priority. Checking the Emergency check box will make this work order appear in the Work Center section of the home page as an emergency work order.
- Identify where the work needs to be done by choosing the Location.
- If your organization utilizes the Building field, select one from the drop down box.
- Choose the general Area type that best fits the location of the work request.
- Enter the specific area in the Area Number field. (The Area Number field is alphanumeric and is where you can enter specific room names or numbers.)
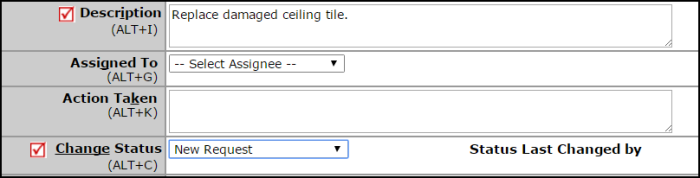
- Enter a detailed request Description in the open text box.
- As a Clerk, you can either directly assign a work order to another user in the Assigned To drop down box or you can leave the drop down box empty for the work order to follow automatic routing rules.
- The Action Taken field is used to document what was done to resolve the problem or request. If entering a work order that has already been completed, you can enter an Action Taken note to communicate the resolution to the requester.
- In the Change Status drop down box, choose New Request. *Note: If entering a work order that is already in progress or has been completed, you can choose the appropriate status.
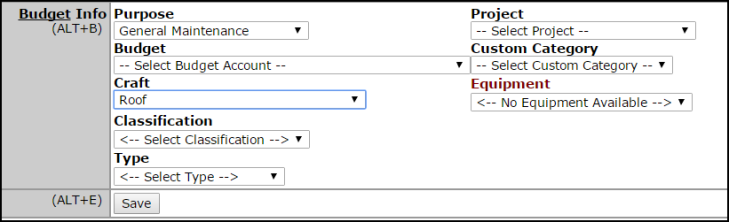
- Choose the Purpose Code that best describes why the work order is requested.
- Select the appropriate Craft to identify what type of work is being requested.
- If your Organization is utilizing Budget Codes, the Custom Category, Projects, Equipment, or Classifications and Types, identify any of the codes by clicking on the drop down boxes.
- Click Save. The work order will now be assigned a work order ID number.